MicronPA’s Industrial CT Scanning Capabilities
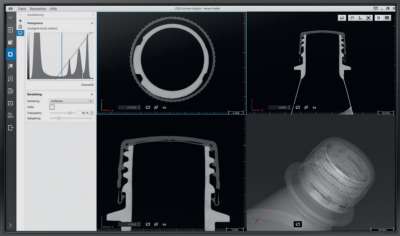
MicronPA supports nondestructive testing with our CT inspection services. Our capabilities include:
- Part to CAD Comparison: After completing an industrial CT scan, we can compare it to your computer-aided design (CAD) print to determine how precisely your component was manufactured.
- Part to part: We scan two parts, one being the golden standard for accuracy and the other being the part you’d like to validate. With two scanned models, we can lay the images over top of each other to compare accuracy. This can be very helpful in detecting tooling wear over time.
- Reverse engineering: If you lack CAD data or spare parts, we can use a CT scan to create a point cloud file that can be used to create a detailed CAD model.
- Wall thickness analysis: A part’s wall thickness is essential to its durability and performance. With wall thickness analysis, we can identify weak points that aren’t within required tolerances.
- Internal part integrity: Many processes such as casting and injection molding can not make parts completely free of internal defects such as porosity, inclusion and cracks. By performing an internal part integrity inspection, we can digitally analyze the part for such defects without having to cut the parts open.
First article inspection (FAI) services see significant benefit from industrial CT scanning, as it creates a comprehensive view of a component.
The Benefits of Industrial CT Inspection Services
Computed tomography scanning offers many advantages for your operation. Industrial CT scanning is:
- Non-Destructive: In traditional forms of inspection, technicians have to create a cross-section to examine the inside of a part. CT inspection doesn’t cause any damage, allowing you to retain the integrity of your sample.
- Comprehensive: This scanning method provides more complete measurement than manual practices, yielding a better look at your design’s accuracy.
- Easy to compare: With a 3D model of your part, it’s easy to conduct comparisons between components or use CAD software to confirm precision in production. The easier comparison also leads to quicker validation and reporting.
- Versatile: While traditional metrology methods cannot measure extremely small parts or flexible articles accurately, industrial CT scanning can accomplish this goal.
Contact MicronPA for Computed Tomography Inspection Services
MicronPA has over 30 years of experience in calibration and inspection. We operate out of York, Pennsylvania, and serve manufacturers throughout Pennsylvania and beyond. Get in touch with us today for CT inspection services.

